Fleet Maps
Enterprise Only
This feature is under the enterprise plan only.
Fleet Map Overview
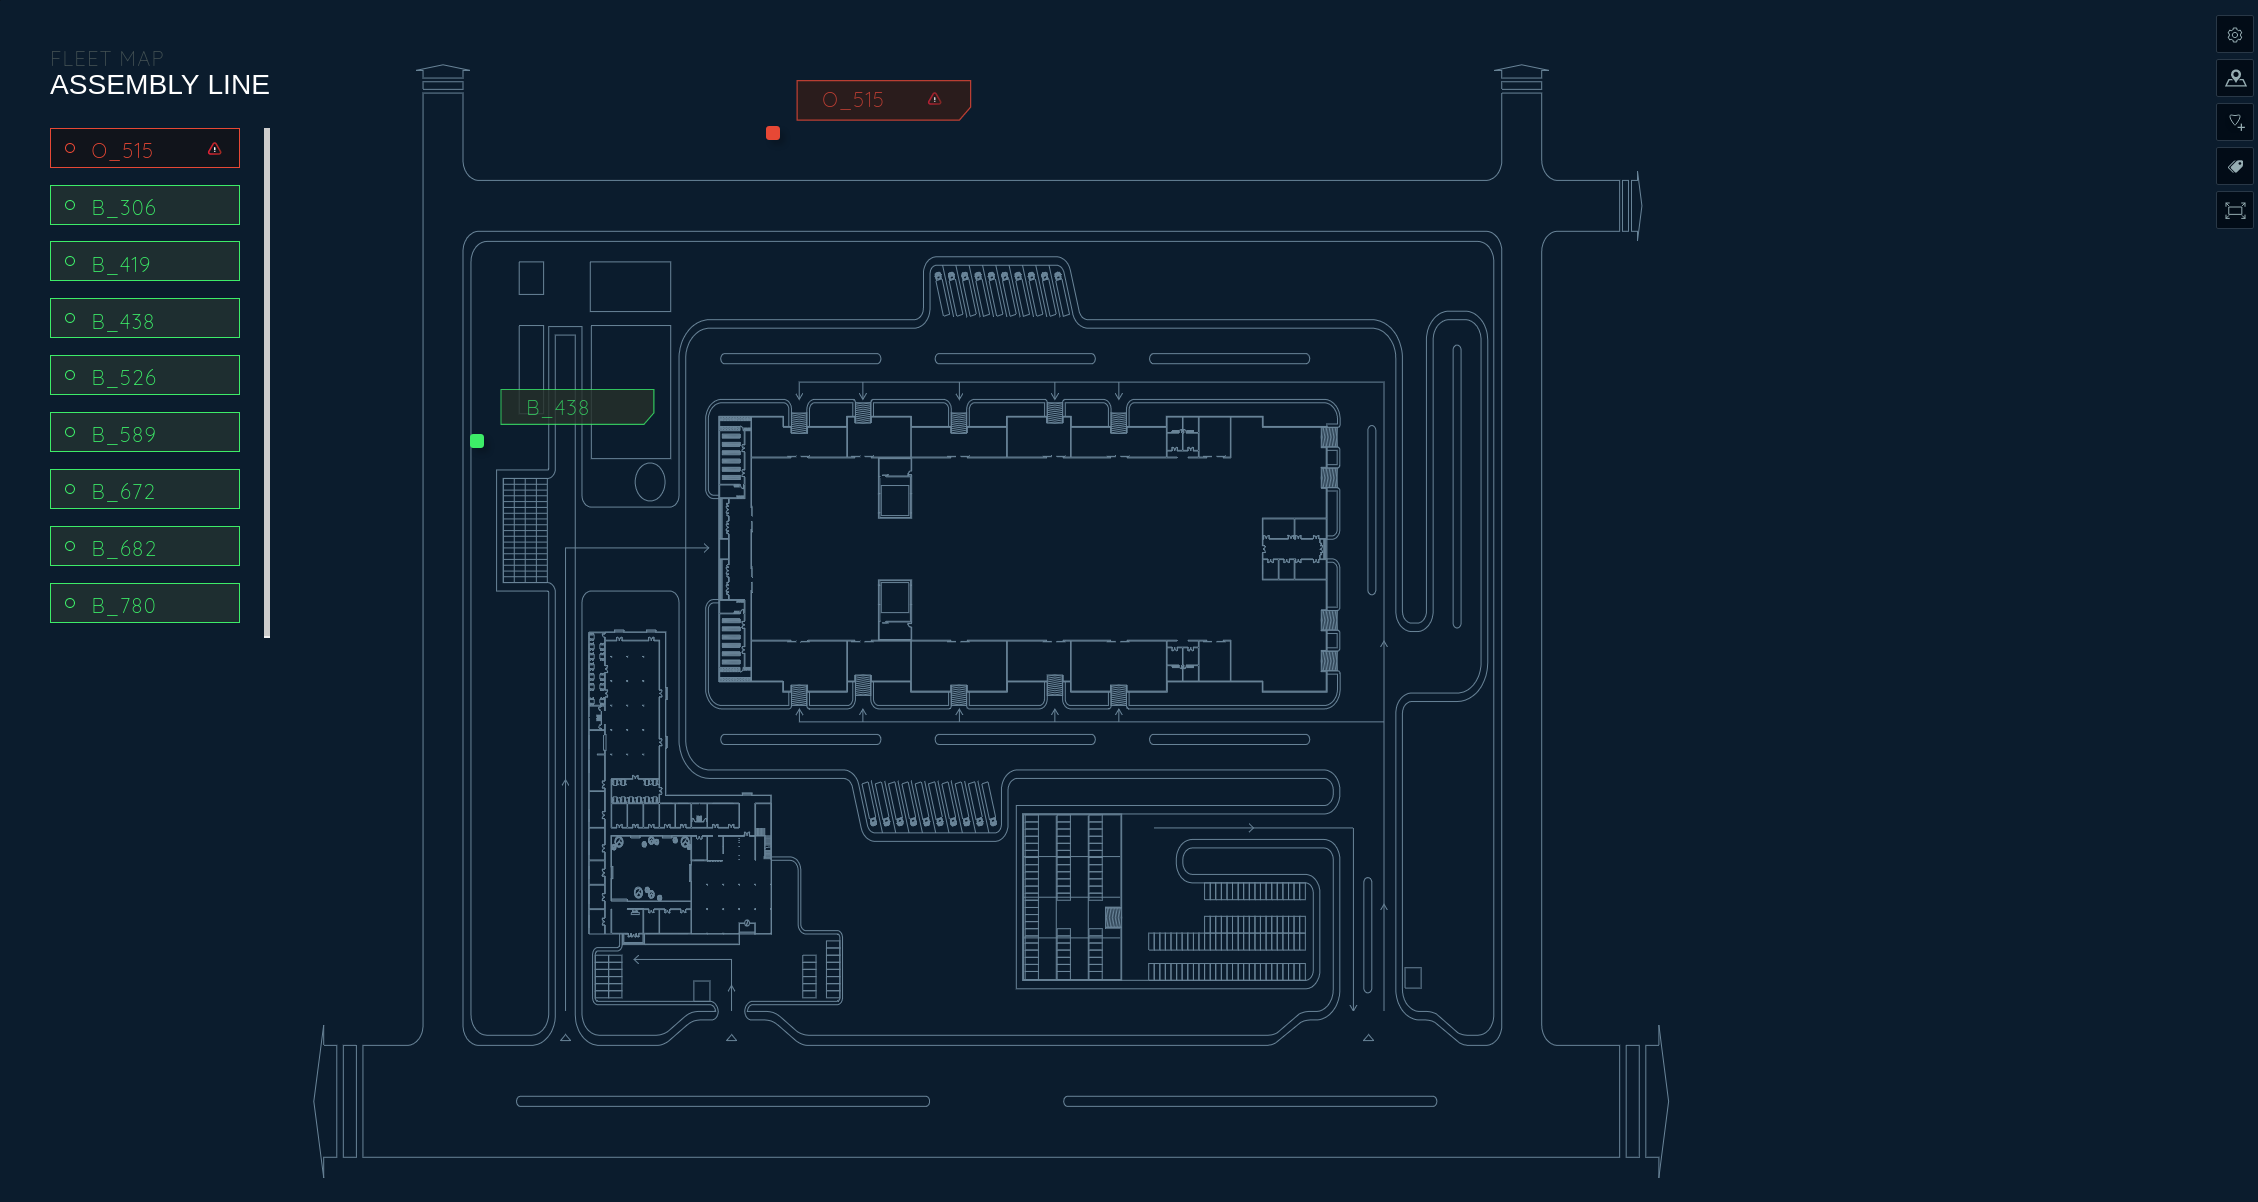
Fleet Maps are a tool to view devices within a Zone. An example is shown in Figure 1. The map shows a birds eye perspective of your imported map and the coordinates of the device.

Figure 1: Fleet Map Example
In this example, there is one device B_438 that is active and on the map and one device that has thrown an error: O_515. As a user, you can click on the device for more options and information.
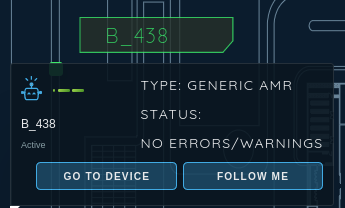
Shown in Figure 2, is an example of a popup. The popup will show the type, status, and 2 actions (Go To Device and Follow Me).
Go To Device will navigate the user to the devices stream page.
Follow Me will center the device in the middle of the view-port. The view-port will stay centered on the device selected.

Figure 2: Stable Device Popup
Another type of indicator on the fleet map is a device that has thrown an error. This device will be indicated by the color red, as shown in Figure 3.

Figure 3: Error Device Popup
The additional information will be the error messages reported by the device.
Fleet Map Group Buttons
In the top right, there is a series of buttons that control the settings and display of the fleet map. This is shown in Figure 4.

Figure 4: Fleet Map Group Buttons
Settings
The Cog Wheel will open a side panel, that allows you to edit the map source, location offset, default zoom, and list points of interest as seen in Figure 5.
Caution
The Zoom Levels are controlled by MapBox. Review these levels before adjusting the minimum and maximum values.

Figure 5: Settings Panel Fleet Map
Pathing
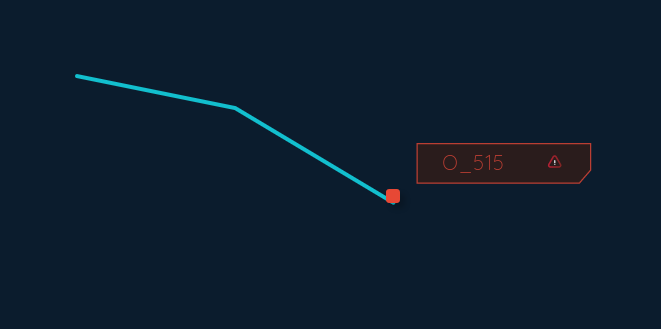
The second icon is a toggle to show the pathing taken by a device. As shown in Figure 6, a device will show a blue trail to indicate the path it has taken. This will not show paths in the past. When the button is toggled is when the pathing will start to draw on the map.

Figure 6: Path Taken
Points of Interest
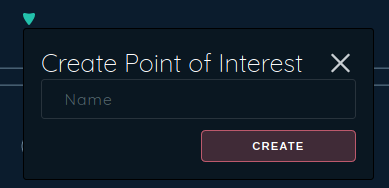
The third icon is a toggle to go into Edit Mode. This will allow you to create Points of Interest. By clicking on the map, a popup will appear. This popup will be a saved marker on the map.

Figure 7: POI
Full Screen Toggle
The last icon will toggle full screen for the map view. This will take over the entire view port and only make the map accessible to the user. It can be turned off by clicking the full screen toggle again.
Updated over 4 years ago
