Navigate with a Map
Time to complete: 10 minutes
In this section, we'll set up map-based navigation for your robot. Freedom Robotics provides top-down and 3D views of your robot in its surroundings, enabling you to view your robot's position, visualize current and future paths, and set navigation waypoints. These features require a localization and (simple) navigation stack to be running on the robot and accepting goal commands.
Relocalizing your robot
Freedom makes it easy to intervene when a robot becomes "lost" or mis-localized. You can click and drag to move the robot to the correct position using LiDAR as a guide, then send a message to the robot to update its confirmed pose and position.
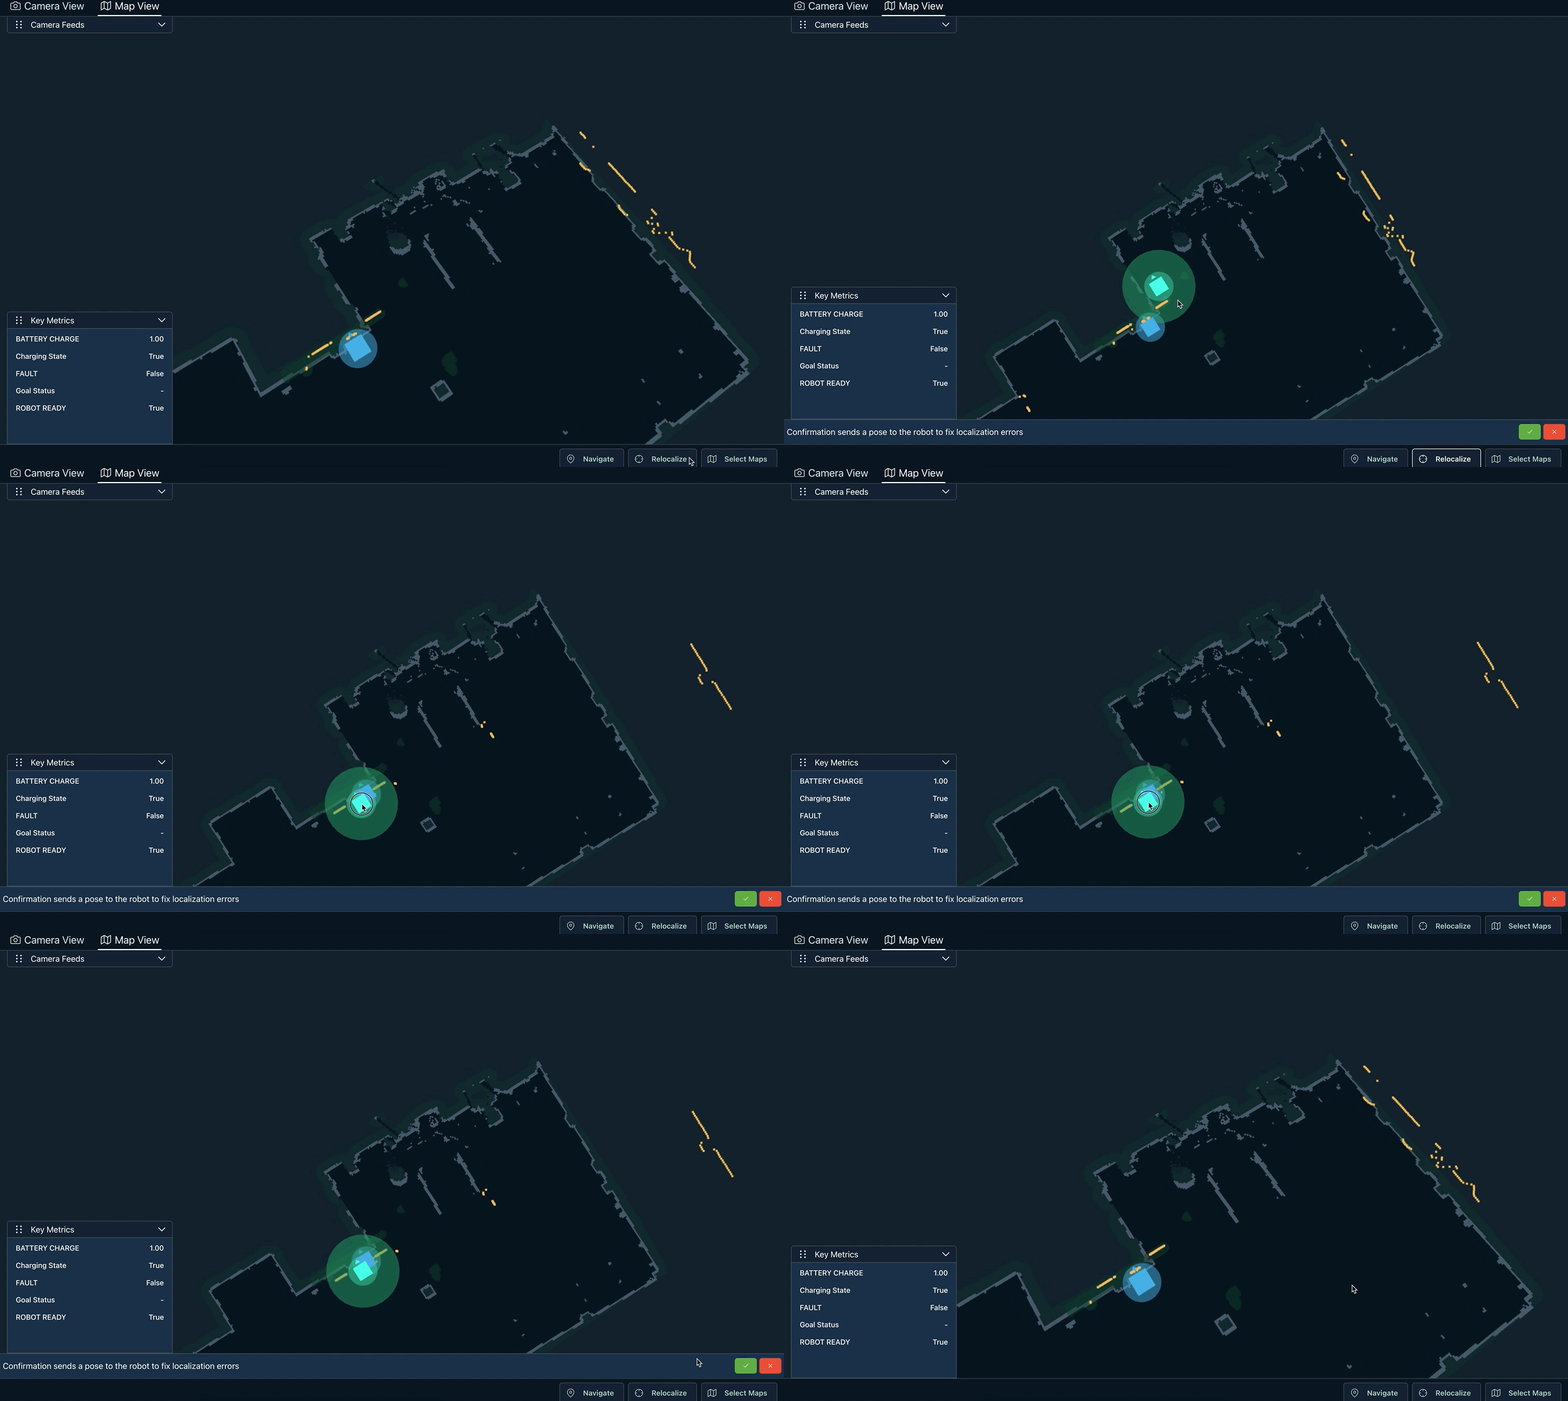
The relocalization tool can be used to adjust the robot position until the LiDAR (shown in blue) matches the appropriate position on the map.
Add the relocalization topic
Navigate to SETTINGS → PILOT → ENVIRONMENT. Under the RELOCALIZE section, add the topic name and set the pose injection frame (e.g. map). If you're using amcl with ROS as your localization solution, the topic is /initialpose by default.
Freedom will publish the pose with covariance data on the indicated topic for your localization algorithm to use as an adjustment. The message will be formatted as the ROS type geometry_msgs/PoseWithCovarianceStamped (see here for more information about the message type).
For ROS users that use particle filter-based localization like amcl, this works out of the box. Non-ROS users will need to create a callback to accept the message (see here to learn more about creating a callback).
Try it out
Head to the PILOT tab and click TAKE OVER. If you haven't yet selected the map view, click on the map in the top right corner of the screen.
Click the localization button on the righthand side of the screen. Click and drag to reposition your robot appropriately, using the live LiDAR stream as a guide. You can adjust the robot's orientation by clicking and dragging farther away from the robot (the cursor will become a curved arrow).
Once the robot is positioned correctly, click CONFIRM. The robot's new pose will be published for your localization algorithm to accept and use to generate updated transformations. The robot's position will then be updated to reflect the new, correctly localized position on the map.
Moving your Device
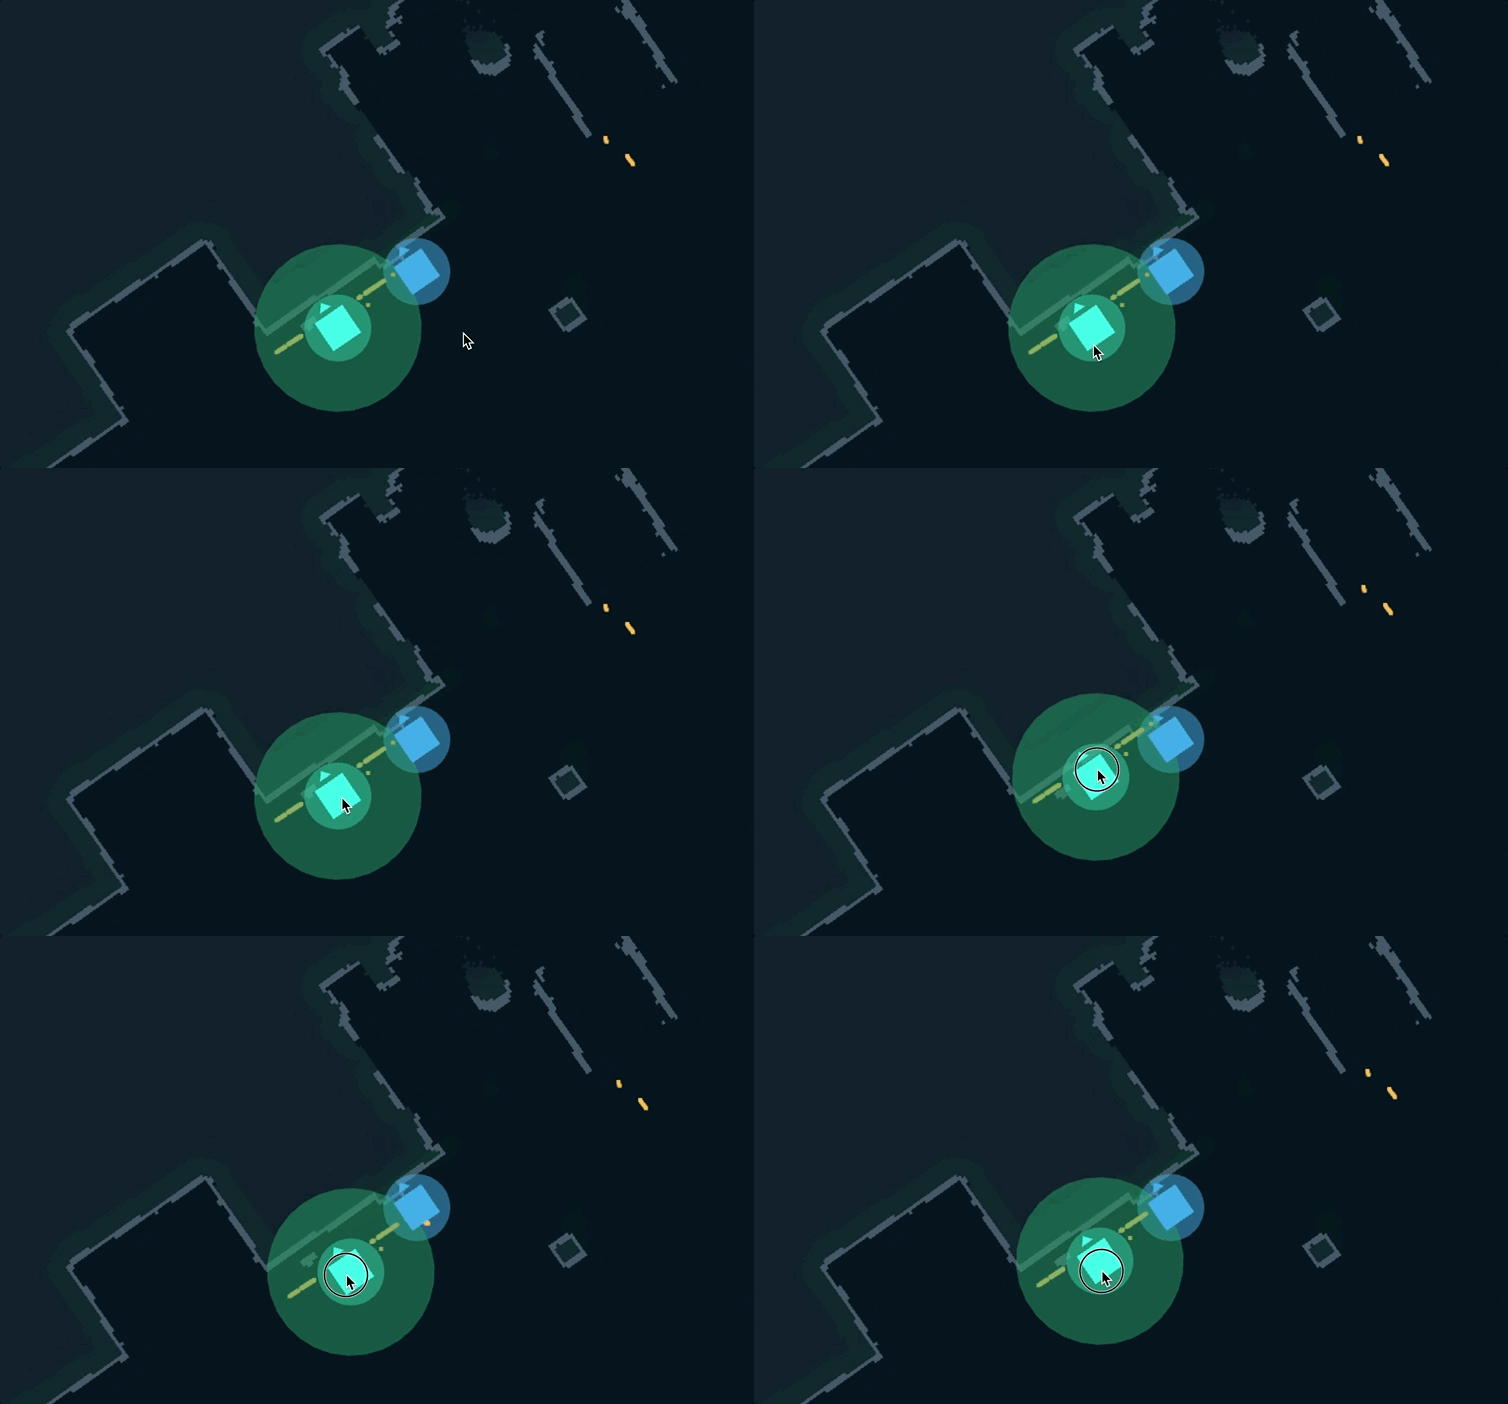
To drag the device, click and hold on the innermost circle. This will drag the device around.
Changing your Device Orientation
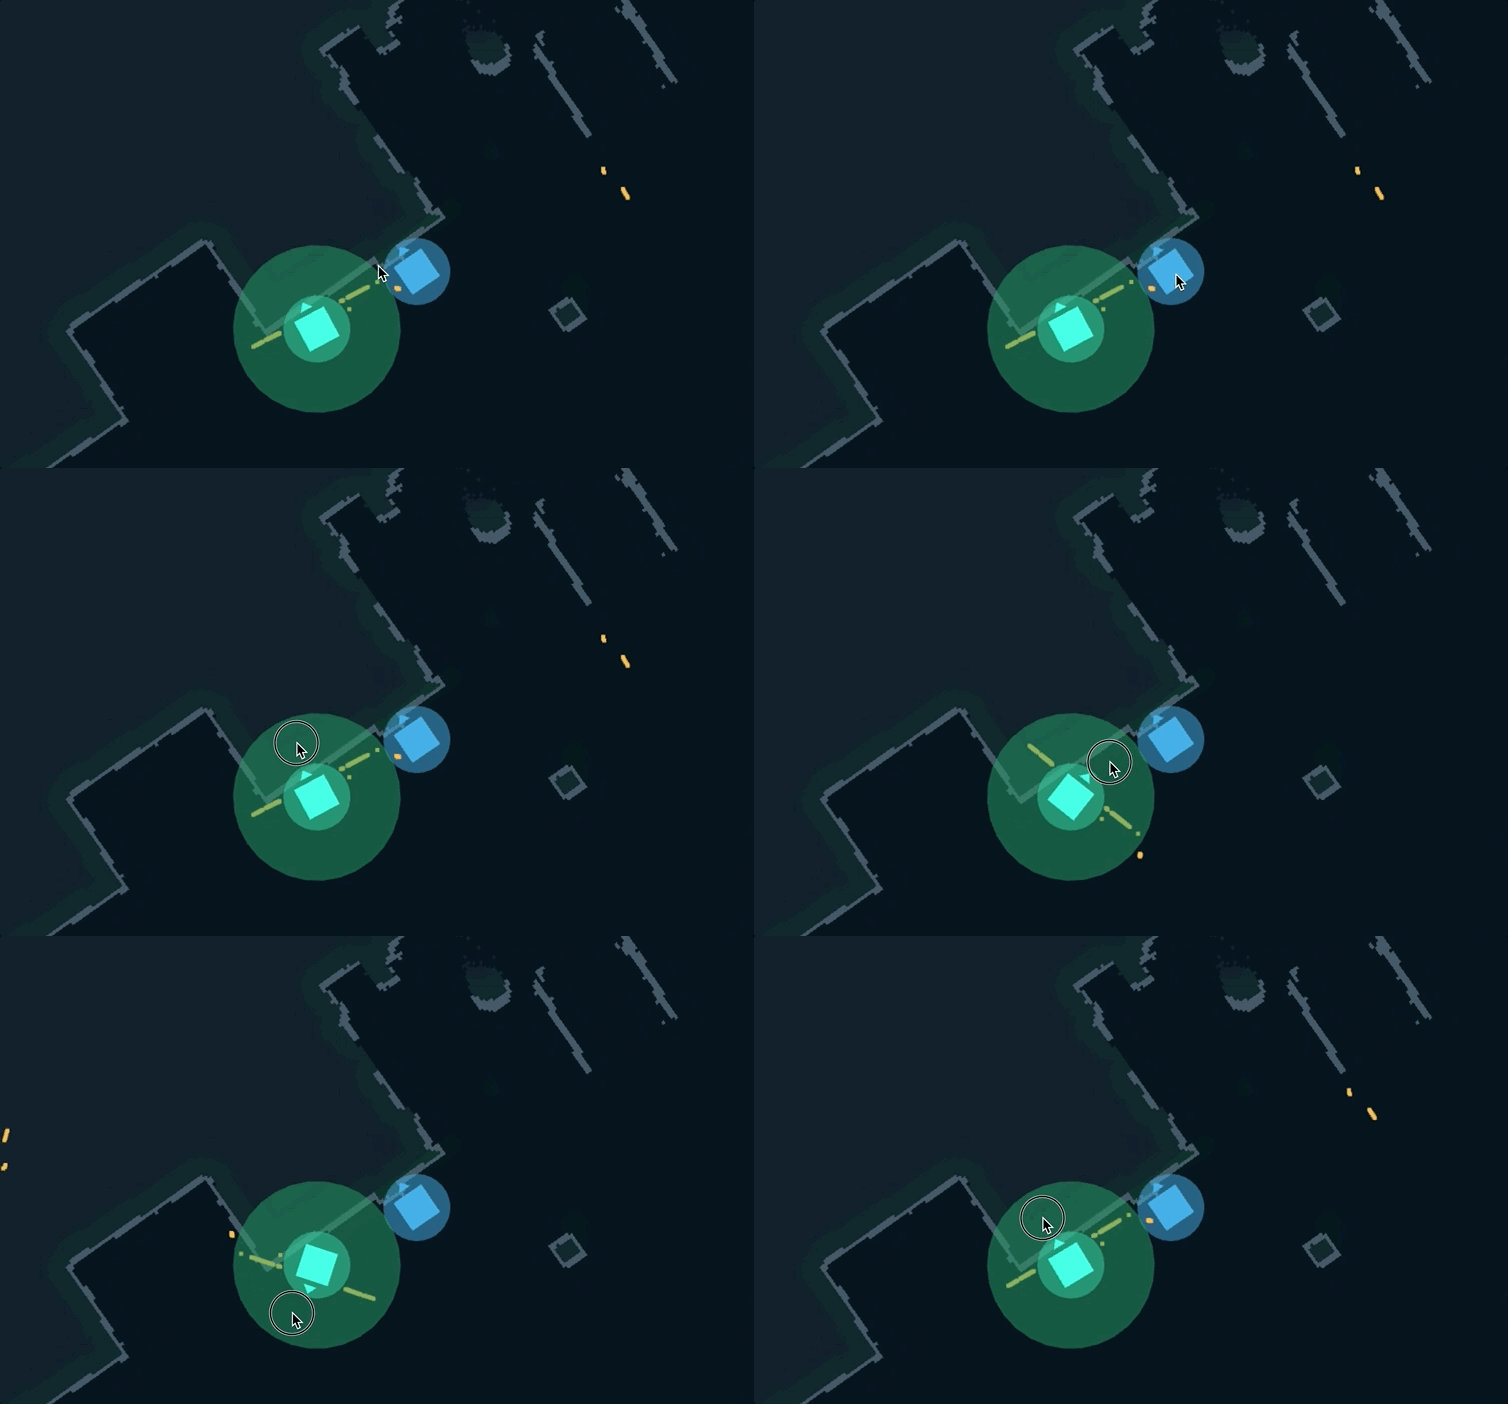
The rotate the device's origin, click and hold on the semi-transparent circle. Then move the mouse only in the confined space of the semi-transparent circle.
To enable you to identify issues and intervene in real-time, we'll walk through the following steps:
1. Set up transformations
2. Add map and path data
3. Navigate to a waypoint
4. Relocalize your robot
Uploading transformation data is required, and we recommend that you also set up all other elements that are relevant to your robot and its operations.
Set up transformations
Transformations define the three-dimensional relationships between various parts of your robot. For ROS-based systems, we have a tf listener running on the robot that sends snapshots of the tf tree at regular intervals. This is not enabled by default and can be enabled by navigating to SETTINGS --> BANDWIDTH and adding a new topic /tf_fr. A frequency of 1Hz suffices for most applications.
Now navigate to SETTINGS → PILOT → ENVIRONMENT. Under the TRANSFORMATIONS section, set name to /tf_fr.
Non-ROS users should review the schema for our transformation messages and how we interpret them here.
Visualizing 3D transformations
To view transformations in 3D, select your robot and navigate to SETTINGS → PILOT → ENVIRONMENT. Under the TRANSFORMATIONS section, enable the options to show the links, axis, and names. Next, return to the PILOT tab, select the map view and click the 3D button. These transformations are updated as the robot moves around.
Add map and path data
Map and path data provide important context for your robot as it navigates in its environment.
Upload map data
To add a map, select your robot and navigate to SETTINGS → PILOT → ENVIRONMENT. Under the MAP section, add the topic name for each of the maps you would like to view. If you add multiple map topics, the data will be overlaid on top of one another with the desired transparency. Enable auto-update if the map changes frequently (costmaps or while running SLAM). Make sure that the map topic is enabled in the bandwidth settings.
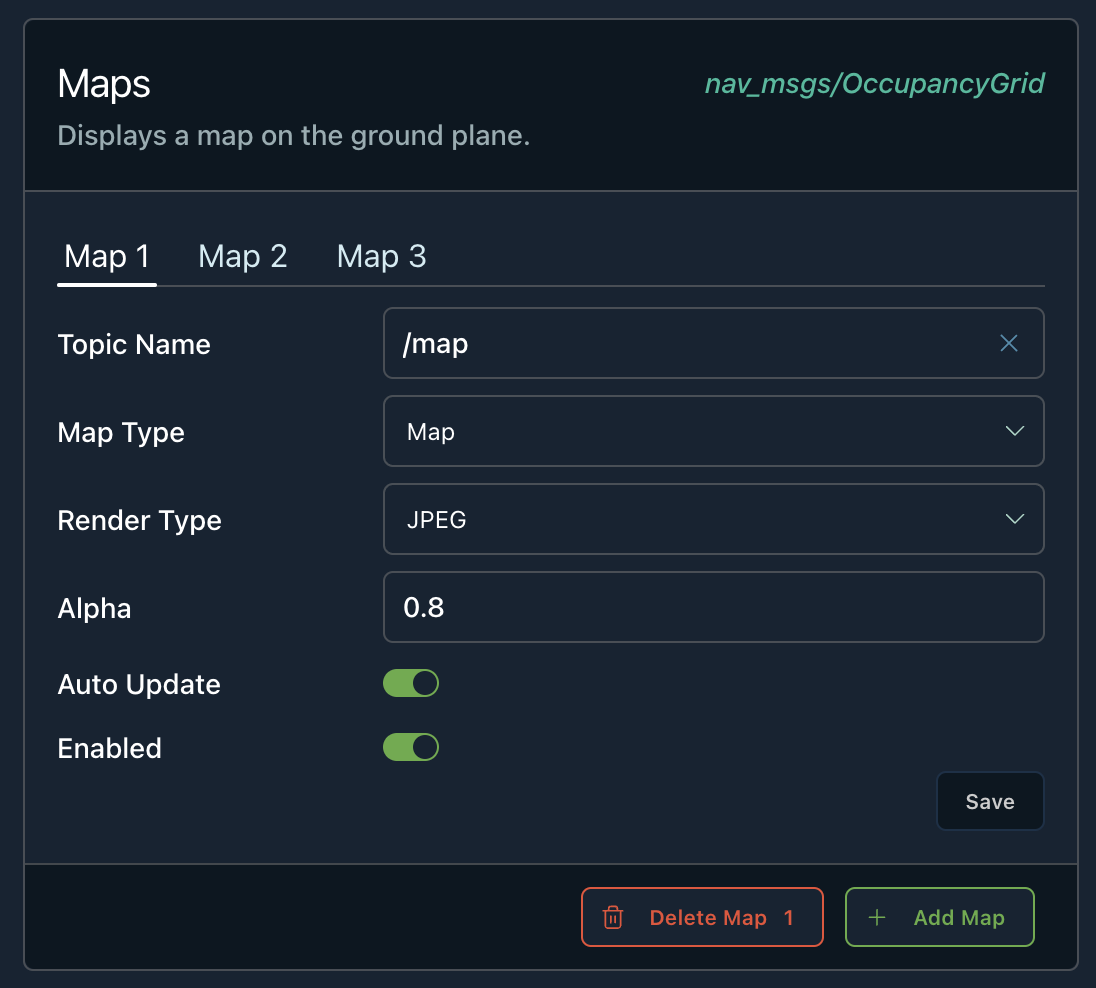
example configuration with 3 maps
Map data should be formatted as the ROS type nav_msgs/OccupancyGrid. See here for more information.
Always publish the full costmap
When using costmap_2d, make sure you set the parameter
always_send_full_costmapto true in your configuration or launch file.
Upload path data
This will allow visualization of the path the robot is following. To add path data, select your robot and navigate to SETTINGS → PILOT → ENVIRONMENT. Under the PATH section, add the path topic name.
Path data should be formatted as the ROS type nav_msgs/Path.
Tune upload bandwidth
We recommend an upload rate of 1-10 Hz depending on the path or map size for dynamic maps. For static maps, set the upload rate to 'once'. See the guide to tuning bandwidth for information on how to change a topic's upload frequency.
View map and path data
Next, return to the PILOT tab. If you haven't yet selected the map view, click on the map in the top right corner of the screen. You'll now see your robot with the current map and path data displayed. If you have multiple maps, you can toggle them on and off by clicking SELECT MAPS in the bottom left corner of the screen.
Set up navigation
Freedom Robotics provides an intuitive click-and-drag interface that lets you send navigation goals to your robot.
Add a navigation goal
Navigate to SETTINGS → PILOT and select the MOVEMENT tab. Add your navigation goal topic name (e.g. /move_base_simple/goal and set the pose injection frame (e.g. map).
When you provide a navigation goal, Freedom will publish a message formatted as the ROS type geometry_msgs/Pose on the navigation topic name you provided (see here for more information on the message schema).
If you are using ROS, the standard move_group navigation node will accept this message. Non-ROS users will need to create a callback (see here to learn more about creating a callback).
Try it out
Next, head back to the PILOT tab, click TAKE OVER, and enter map mode by clicking on the map in the top right corner.
Click the NAVIGATE button on the righthand side of the screen, then click on the robot and drag it to the desired location. Adjust its orientation as desired, then click CONFIRM. If your robot's navigation stack is ready to accept a navigation goal, your robot will begin navigating to the waypoint!
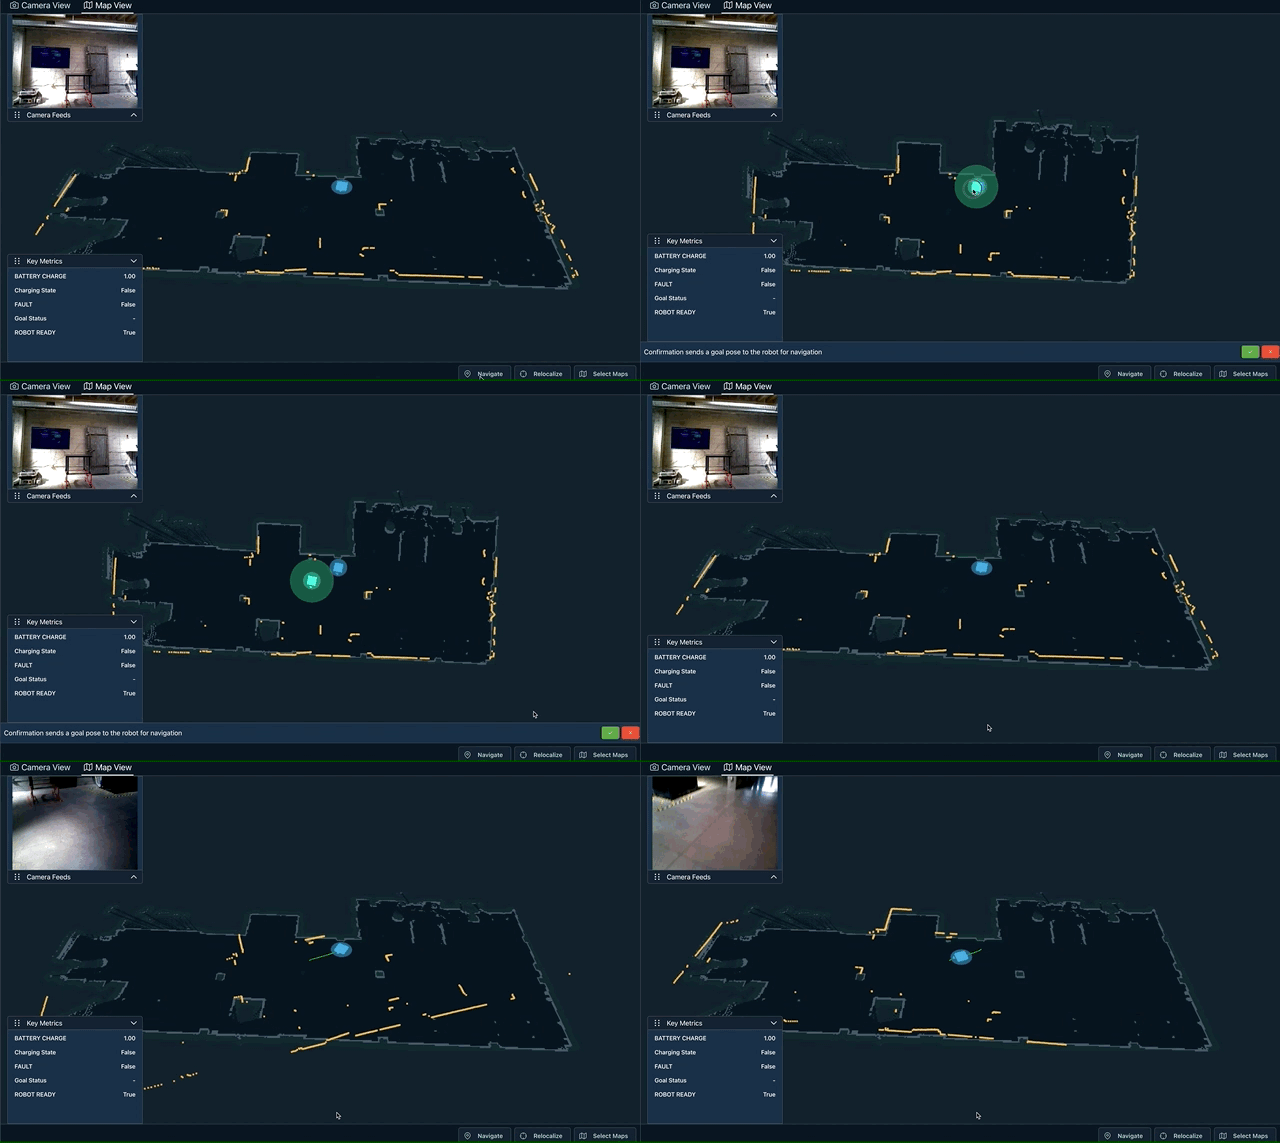
Add a waypoint on the map and follow along in real-time as your robot navigates towards it.
Stopping your robot
While your robot is navigating, you can click the red MANUAL CONTROL button at any point to take over. This will send a zero velocity command to the wheels and send an empty message to the /move_base/cancel topic. You can change this default behavior in
SETTINGS → PILOT → CONTROLS under the NAVIGATION STOP BUTTON section.
Updated about 3 years ago
