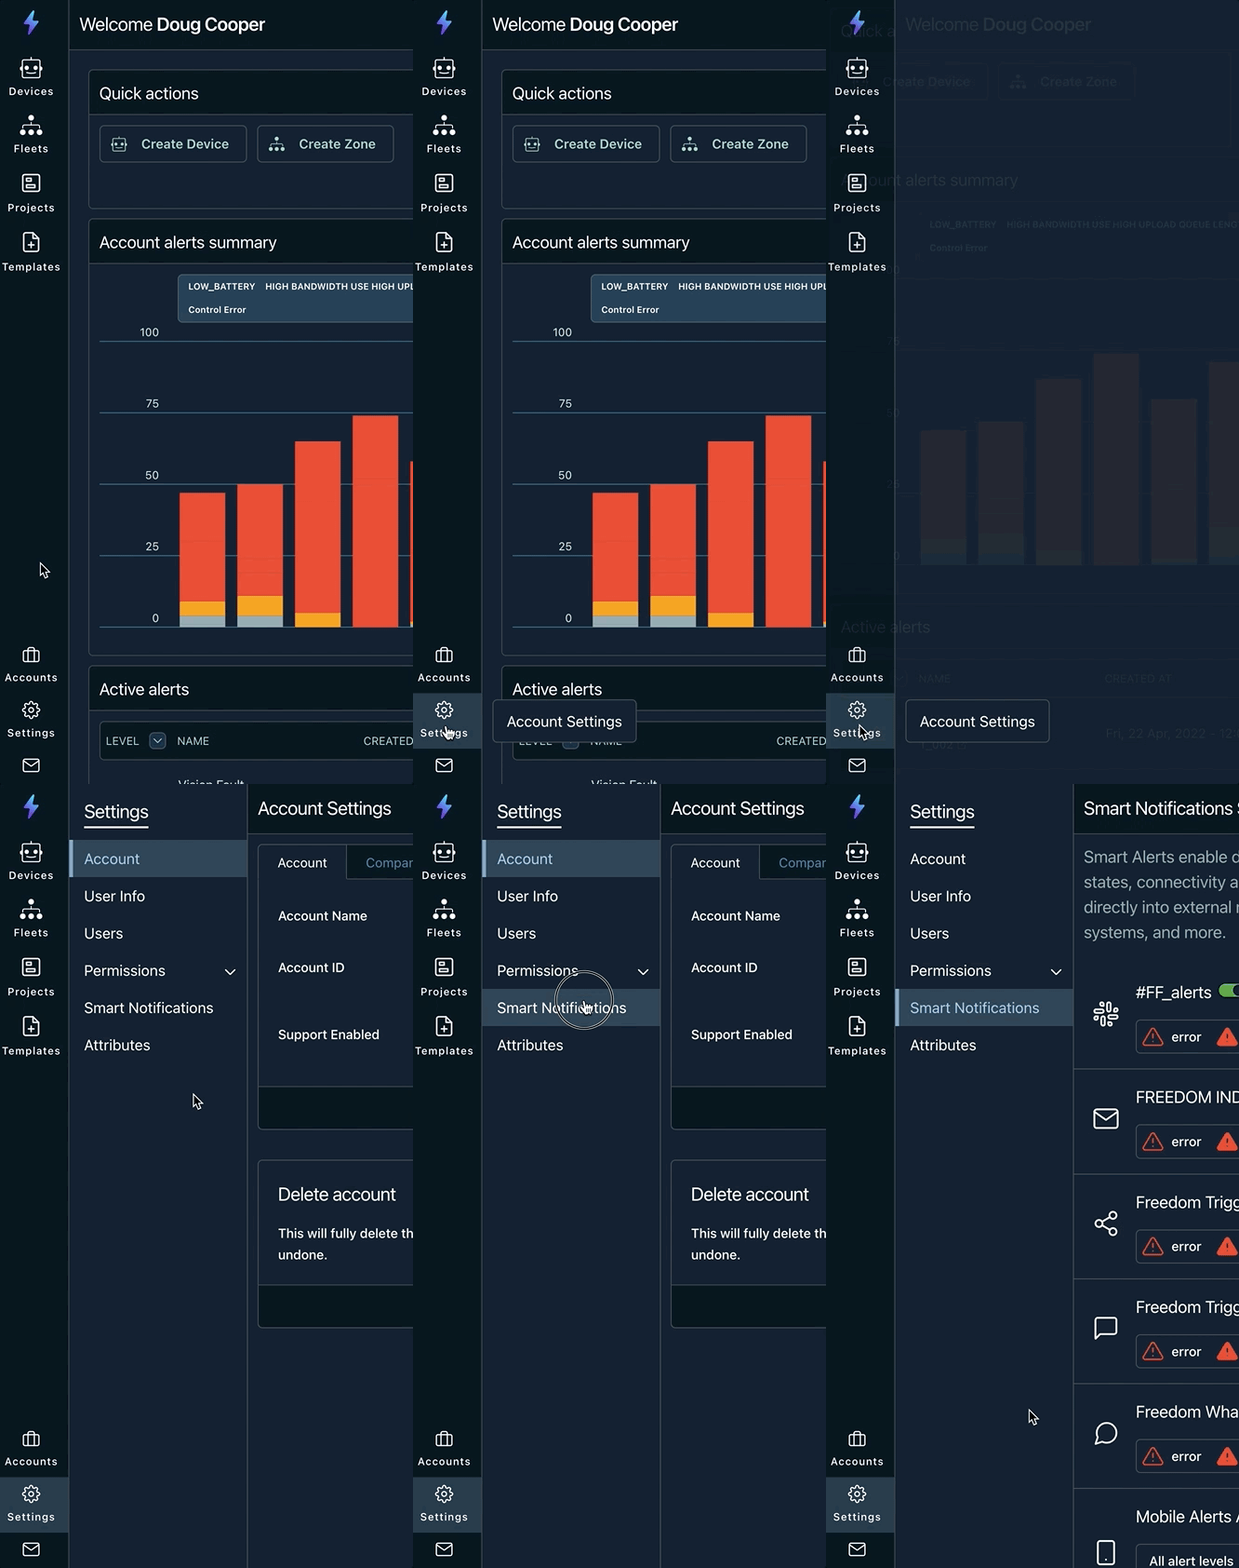
Enable Smart Notifications
Alerts become even more powerful when you connect them with the tools you already use. Integrations give you the power to intelligently route alert notifications to keep your operations teams, developers, and customers informed.
Using integrations
To make the most of your integrations, consider who needs to be informed and set the minimum notification level appropriately. For example, you could:
- Send alerts with a level of WARN or higher to Slack in a channel dedicated to support.
- Send ERROR and FATAL alerts to PagerDuty where they are distributed to the operations team to triage and resolve.
- Send all FATAL alerts to the team's
[email protected]email list so that everyone sees them. - Log all alerts, including INFO, to your own custom system for comprehensive statistics tracking.
Add an integration
Let's set up an integration! Choose from email, Slack, PagerDuty, IFTTT, or custom webhook.

Email
By default, we send email notifications to the address associated with your account for alerts of level INFO and higher. You can adjust these settings or add additional email addresses by navigating to MENU → TEAM SETTINGS.
To add a new email address, scroll down to the Smart Alerts Integrations section and click ADD.
Set the type to EMAIL, add a descriptive name for your alert, and set the minimum notification level. Provide the email address you'd like the alerts sent to, then click SAVE.
Slack
Freedom's Slack integration is an easy way to broadcast alerts to your team.
Generate a Slack webhook URL
To set up this integration, you'll need to generate a Slack webhook URL. You can check out the instructions from Slack here. Your Slack webhook URL will look like this:
https://hooks.slack.com/services/...
Set up the integration
In the Freedom App, click Settings → Smart Notifications. Scroll down to the Smart Alerts Integrations section and click ADD.

Set the type to SLACK WEBHOOK, add a descriptive name for your alert, and set the minimum notification level. Add the Slack webhook URL, then click SAVE.
PagerDuty
The PagerDuty integration enables you to control who receives certain alerts and when they receive them.
Generate a PagerDuty integration key
To set up this integration, you'll need to generate a PagerDuty integration key. You can check out the instructions from PagerDuty here. Be sure to choose Events API v2.
Set up the integration
In the Freedom App, click Settings → Smart Notifications. Scroll down to the Smart Alerts Integrations section and click ADD.
Set the type to PAGER DUTY WEBHOOK, add a descriptive name for your alert, and set the minimum notification level. Add your PagerDuty integration key, then click SAVE.
IFTTT
IFTTT allows you to easily connect services and set up triggers and responses.
Generate an IFTTT key and trigger
To set up this integration, you'll need to generate both an IFTTT key and trigger. First, go to the
IFTTT Webhooks page and click the Connect button. Click the Settings button. Your IFTTT key is the long string at the end of the URL:
https://maker.ifttt.com/use/<YOUR_IFTTT_KEY>
Next, go to the Platform page and select the Applets tab. Click the New Applet button. In the Trigger section, search for Webhooks. Select Receive a web request. Choose a name like freedom_smart_alert for the Field Name. This name is your IFTTT trigger.
Add the action that you would like to trigger and fill in the remaining details, then save and publish your Applet.
Set up the integration
In the Freedom App, click Settings → Smart Notifications. Scroll down to the Smart Alerts Integrations section and click ADD.
Set the type to IFTTT DUTY WEBHOOK, add a descriptive name for your alert, and set the minimum notification level. Fill in your IFTTT key and trigger, then click SAVE.
Payload format
When an alert is sent to the IFTTT interface, the details of the alert are sent as a JSON payload in the following format:
{
    "value1": "`BATTERY ISSUE` alert for `Droid 3`",
    "value2": "ERROR TRIGGERED",
    "value3": "https://app.freedomrobotics.ai/#/devices/..."
}
| Parameters | |
|---|---|
value1 | Issue name and device name |
value2 | Issue level and whether the alert was triggered or cleared |
value3 | Share link for the time when the issue occurred |
Custom Webhook
When you build your application using Freedom, you may want to integrate with a custom service, such as one of your own servers.
Set up the integration
In the Freedom App, click Settings → Smart Notifications. Scroll down to the Smart Alerts Integrations section and click the ADD button.
Set the type to CUSTOM WEBHOOK, add a descriptive name for your alert, and select the minimum notification level.
Select the HTTP request type (PUT or POST). Add the URL of your webhook, beginning with https://..., and click SAVE.
Payload Format
When an alert is sent to a custom webhook, the details of the alert are sent as a JSON payload in the following format:
{
    "account": "A0000000000000000000",
    "device": "D0000000000000000000",
    "alert_id": "ALT0000000000000000",
    "name": "LOW_BATTERY",
    "type": "mc.device.data_outside_bounds",
    "action": "clear",
    "level": "warn",
    "attributes": {             // Specified by the trigger
        "voltage": 14.3,
        "current": -3.12,
        "state": "NOT_CHARGING"
    },
    "utc_time": 144032234.23,
    "elapsed_secs": 1213.43    // Only exists on "action": "clear"
}
Test your integration
Now that you've set up your first integration, let's make sure it works. In the Freedom App, click Settings → Smart Notifications. Click Send Test Alert.
Select your device and choose the alert level (you can keep the default name and description). Be sure the alert level is equal to or higher than the minimum alert level for the integration you're testing.
Alert Levels
The hierarchy of alert levels is
INFO<WARN<ERROR<FATAL.
Click CREATE to send the test alert. In just a moment, you'll receive an alert notification in your service of choice!
Updated almost 4 years ago
