Control your Robot
Time to complete: 10 minutes
In this section, we'll set up video feeds, command shortcuts, and key metrics. These are the minimal features most users need to monitor their robot and intervene if something goes wrong. For example, you could:
- Monitor a coffee-making robot, observe a spill, and request it run a robotic cleaning sequence
- Actuate a recovery behavior after a human identifies a problem on a mobile robot
- Remotely monitor camera feeds on an inspection robot
To get started controlling your robot, we'll walk through setting up the following:
1. Add video feeds
2. Add shortcuts for common commands
3. Add key metrics for your robot's status
4. Start controlling your robot!
Add video feeds
You can stream video feeds with low latency to allow you to safely control and operate your robot. If you haven't already, we strongly recommend that you enable WebRTC before moving on to the next step, to get the lowest latency connection possible to the robot.
Video feeds are automatically detected
Launch a node which publishes camera images of type sensor_msgs/Image. The Freedom Agent will detect the node and upload the data for you. That's it! There's nothing else you need to do.
To ensure that the camera images are making it to Freedom, check that the image topics are included in the list shown on the SYSTEM page or take a look at the STREAM page.
We recommend setting your video feed to upload to the cloud at 1 Hz (WebRTC will separately upload the feed at 10 Hz). You can set the upload rate by navigating to SETTINGS → BANDWIDTH.
You can launch multiple camera image nodes, and Freedom will allow you to switch between them when piloting your robot.
Add shortcuts for common commands
Freedom allows you to send a pre-defined message payload to a topic. You can think of these as memorized commands that can be replayed. Undock a robot. Reset an arm. Initiate a script to brew coffee.
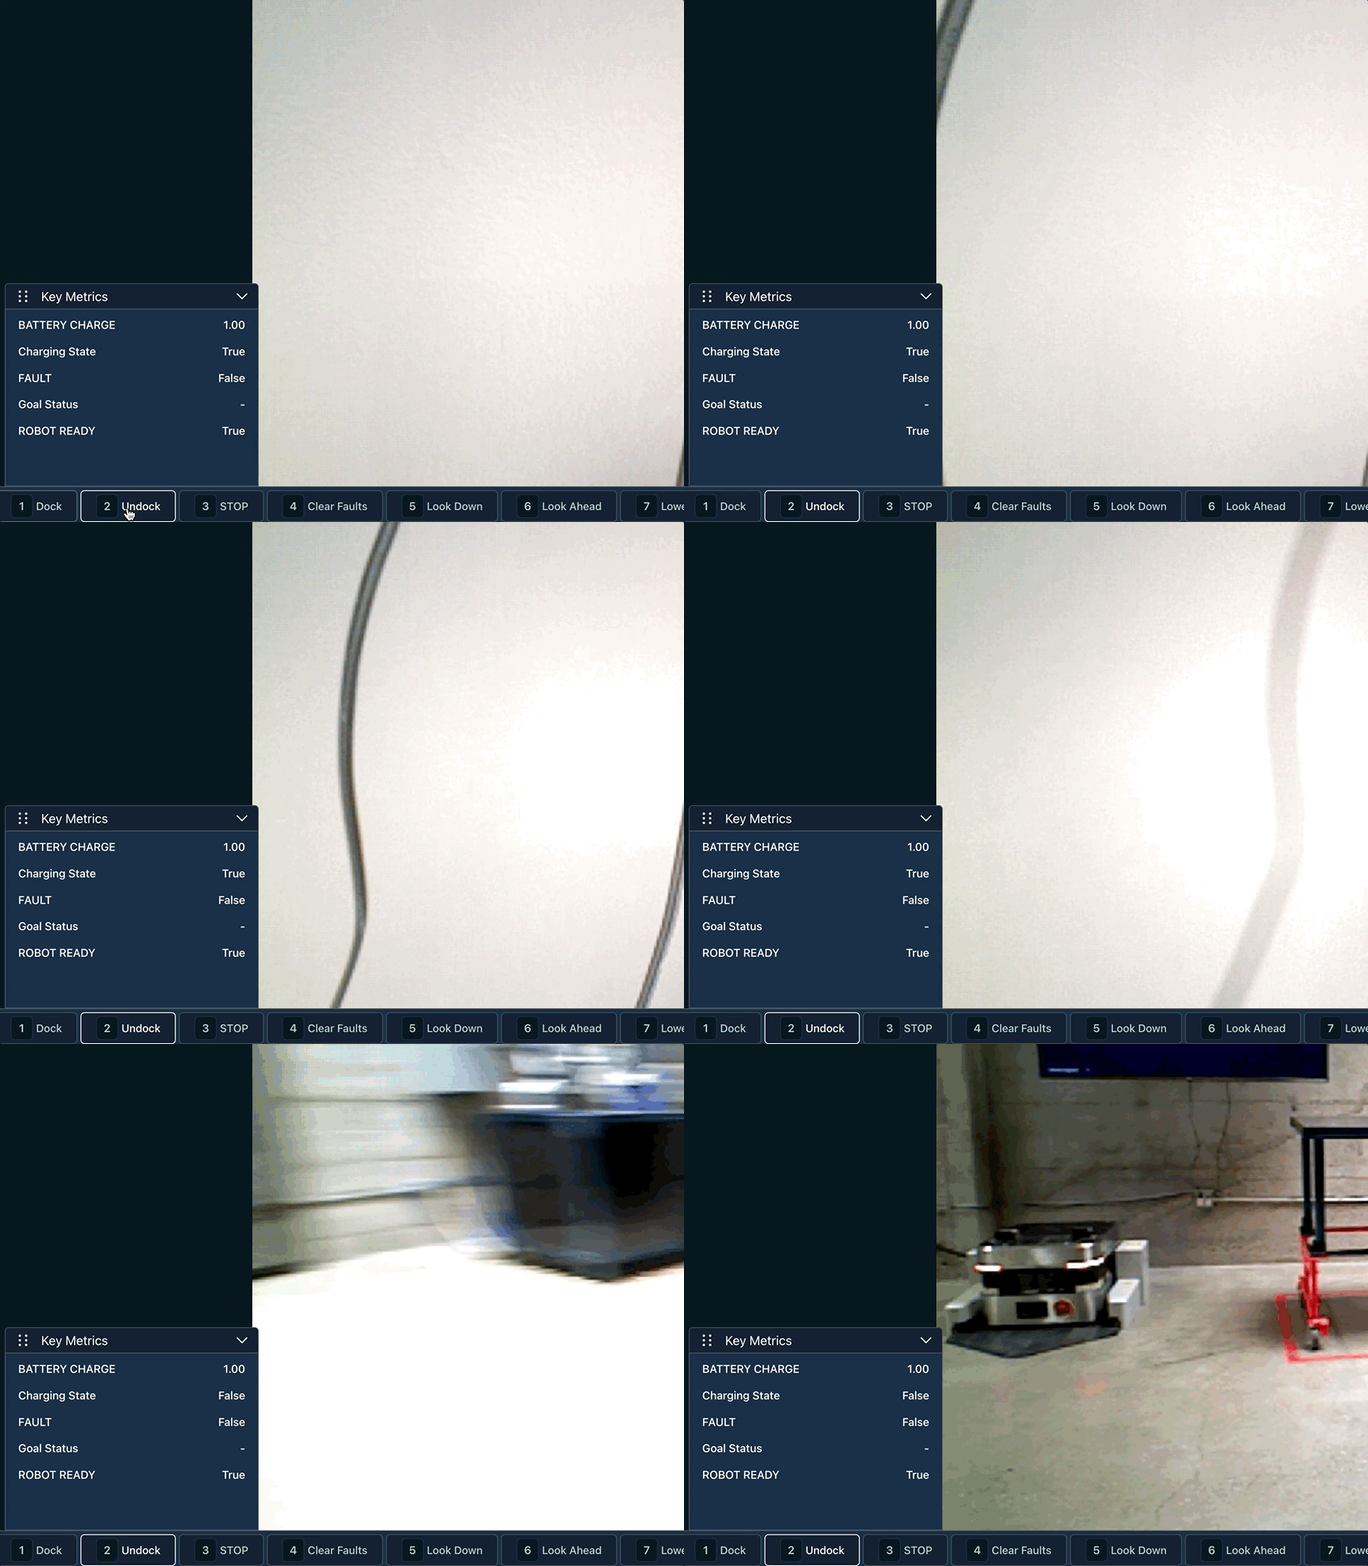
When you're piloting a robot, the available commands are shown in the footer of the pilot view. Here's what this looks like for our fetch device looks like:

To create a new command, go to SETTINGS → PILOT → CONTROLS → ADD NEW COMMAND. You'll need to specify a nickname, topic name, topic type, and payload.
Here are example commands for UNDOCK and MAKE COFFEE:
| Parameter | Undock | Make Coffee | Description |
|---|---|---|---|
| Nickname | UNDOCK | MAKE COFFEE | Display name for the command. |
| Topic Name | /undock | /commands | Topic to publish on. |
| Topic Type | std_msgs/Empty | std_msgs/String | Type of message to publish. |
| Expiration Seconds | 5 | 5 | The lifetime where the command is valid. |
| Payload | {} | {"data":"make_coffee"} | Payload to publish when the command is sent. |
Add key metrics
Think of key metrics as the most important pieces of information that an operator needs to see at a glance to determine a robot's state. When you're piloting a robot, the key metrics are shown in the bottom left corner of the screen.

The fetch is undocked and we can see the Charging State is set to False.
How key metrics work
A key metric should be set up to define the "good" or "normal" state for your robot. If your robot doesn't meet this condition while being piloted, Freedom will call attention to this by highlighting the key metric in red on the Pilot user interface.
Add a new key metric
To add a new key metric, navigate to your device and select SETTINGS → METRICS → ADD.
Here's an example of a key metric for the bumper of a robot:
| Parameter | Value | Description |
|---|---|---|
| Nickname | Left Bumper | Name of the key metric. |
| Topic | /bumper | Topic associated with the key metric. |
| Path | is_left_pressed | Relevant key in the message (JSON object) published on the topic. |
| Operator | Equals | Type of comparison. |
| Value | FALSE | Value used in the comparison. |
If the key metric condition is met (in this case, is_left_pressed = FALSE), all is well with the robot. If not, something is wrong.
Control your robot!
It's time for the fun part: controlling your robot! Click PILOT on the left sidebar, then click TAKE OVER.
View video feeds
If you have multiple video feeds, you can switch between them by clicking on the feed you'd like to view in the top left corner of the screen.
Send a command
You can send a command by clicking on an option in the bottom right corner.
View key metrics
The key metrics you've added will appear in the bottom left corner of the screen. Pay special attention to any that appear in red - this means a value is not in a "normal" state, and something has gone wrong!
Updated about 3 years ago
